Wrinkles in Gelcoat
Why has my gelcoat got wrinkles?
So, you’ve just completed your first fibreglass moulding or maybe you have been moulding for quite some time? but suddenly, your GRP parts are coming out with patches of wrinkles or sometimes referred to as crinkling of the gelcoat. Here are some examples: -
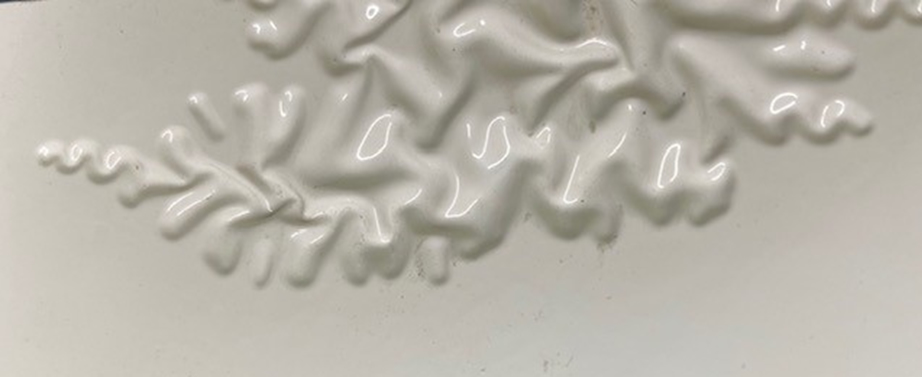
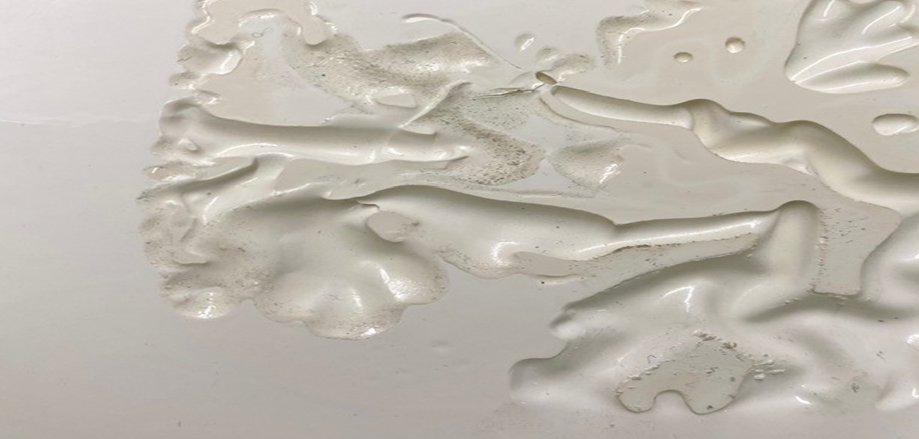
Quite a few things can typically cause this problem: Gelcoat being too thin, gelcoat not having a chance to cure properly, first layer of resin applied onto the gelcoat is taking too long to cure or if you are applying a second layer of gelcoat which is also taking too long to cure.
If a gelcoat is too thin it will not be able to resist the styrene present in the resin. chances are if the gelcoat is too thin it also probably hasn’t cured properly due to lack of exotherm. So, when you apply your matting with the resin or if you apply a second gelcoat, the styrene within these products which is a solvent, will start to attack your first gelcoat layer much like a paint stripper does to paint.
Also, If the gelcoat has cured properly but your resin takes too long to cure due to not enough catalyst or low working temperatures then the same thing will happen. It is important to have good working temperature but just as important to have the materials and mould conditioned at a good room temperature too before you start.
Once you have a fully cured gelcoat i.e., gone off enough to be slightly tacky but no colour rubs off on your fingertips, then you can start the lay-up process. Your working temperature, conditioned temperature of material and the catalyst ratio should be at a level that ensures your fibreglass cures within say 30mins but no longer than 40mins -1hr. If it helps apply 1layer with a faster mix of resin and leave this layer to cure as a barrier before adding further layers.
Other not so obvious causes could be down to contamination such as a bit of acetone, styrene or uncatalyzed resin being spilled onto the gelcoat prior to lay-up.
How to repair
If the wrinkling is not too severe and only in a few areas, you can use a Dremel or detail router with a good diamond tip and open the area to get a good abrasion of the surface. Then using some of the same gelcoat catalysed, fill the affected area slightly proud of the original surface. Leave it over night to cure and reach optimum hardness then wet and dry and polish to finish. Be careful not to cut back the surrounding surface too much especially if you suspect the gelcoat has been applied too thin.
We currently stock gelcoat repair kit and although the video shows how to repair cracks or chips it is the exact same method for repair so this video may give you a better idea of how to complete a gelcoat repair https://youtu.be/6_Y1UavwhzI
If the wrinkling is quite severe and all over the project, then unfortunately it may be best to scrap it and start again.
So in a nutshell to prevent this from happening again: -
- Ensure your working temperature is around 18degC or above
- Ensure the product and the moulds have had time to condition themselves to the workshop temperature of 18 deg C or above. Likewise, do not lay-up late in the afternoon if you plan on leaving the workshop and allowing the temperature to drop before the cure cycle has finished.
- Do not apply gelcoat to thinly you want approx. 0.6mm thickness with none of the mould showing through the gelcoat but not to thick that it runs here is an example of how to apply gelcoat https://www.youtube.com/watch?v=_itHDix3hPE
- Make sure enough catalyst is applied to whatever product you are applying to the cured gelcoat whether its resin or a second layer of gelcoat.
- Avoid risk of any contaminates getting into your mould such as any spills or splashes of other chemicals.